Wiring Mess (pics included)

Electrical and Wiring Forum Archives
Post Reply
dcbullet
Blue Oval Fan
Blue Oval Fan
Posts: 698
Joined: Fri Apr 01, 2005 6:28 pm
Location: Oceanside, CA

Wiring Mess (pics included)

Post by dcbullet »

The 68 Ranger I have had a camper as well as a trailer hitch for many years. The previous owner removed the camper and didn't know what to do with the wiring so he butchered it. I'm looking forward to rewiring the vehicle and learning a little about electricity. :D

Here is where the rear light wiring comes down the frame by the driver's side rear wheel.

Image

Does this look in good order?

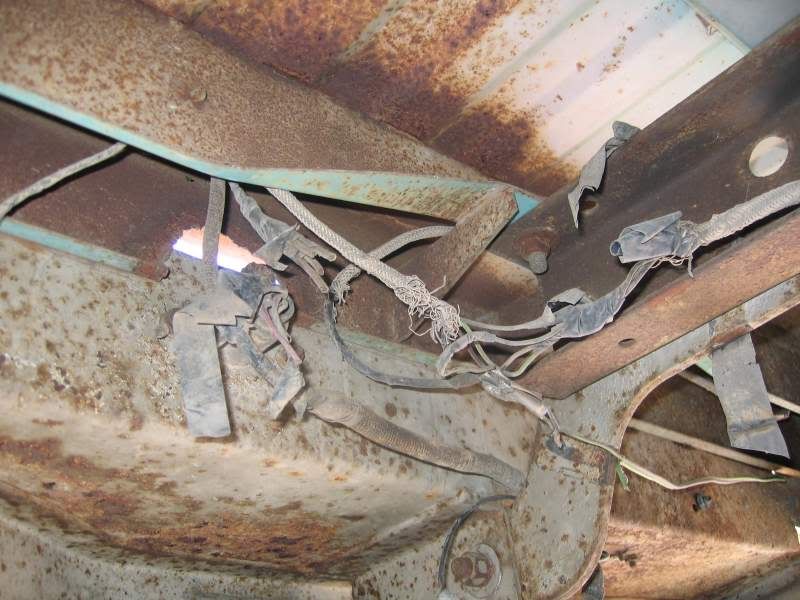
Now, when it gets to the rear bumper, we have this disaster.

Image

Am I right in assuming that I just need to figure out which wire lights up when I press the brake, switch to reverse, or turn on a signal and then hook up the corresponding wires?

If so, when I splice in the wires, should I soder then together and then use one of those plastic covers that your crimp, a cover that you shrink with a heat gun, or is there something else more prefferable? I am interested in doing it the right way one time, so advice is welcomed.

Thanks in advance.
User avatar
willowbilly3
100% FORDified!
100% FORDified!
Posts: 1591
Joined: Mon Jul 19, 2004 7:38 pm
Location: Black Hills

re: Wiring Mess (pics included)

Post by willowbilly3 »

Just use patience and get a good test light if you don't have one. Soldering the wires and using heat shrink tubing is the best repair but I have used the crimp splices for many years without much problem if you tape everything up good to keep out moisture.
I would say that anyone who would torch a hole like that out through the valance might be capable of all sorts of butchery.
Great ideas have always encounter violent opposition from mediocre minds.
User avatar
hardtailjohn
Preferred User
Preferred User
Posts: 422
Joined: Tue Dec 07, 2004 10:24 pm
Location: Montana, Marion

re: Wiring Mess (pics included)

Post by hardtailjohn »

I use the solder/crimp splices... first you crimp it on, then apply heat to the connection, and this activates the heatshrink tubing... then a premeasured amount of solder flows and you have the best of all worlds! They're a bit pricey, but well worth it!!! I get mine from Barnes, but have see the same thing at NAPA and other autoparts stores.
John H.
Never trust a grinning idiot holding a big hammer!
71-F250CS
New Member
New Member
Posts: 1
Joined: Fri May 13, 2005 11:52 pm
Location: Oregon

re: Wiring Mess (pics included)

Post by 71-F250CS »

You could also use butt-connectors and squirt silicon sealer (Permatex or other) into either end to make it waterproof. Like the other guys said though, solder and adhesive lined heatshrink tubing is the trick way to go.
1971 Ford F250 Camper Special, Sport Custom
2X4, 390, C6
User avatar
willowbilly3
100% FORDified!
100% FORDified!
Posts: 1591
Joined: Mon Jul 19, 2004 7:38 pm
Location: Black Hills

re: Wiring Mess (pics included)

Post by willowbilly3 »

Aw, that's nothing, Most othose old trucks look worse than that. Tailight wiring is a good place to get your feet wet with your electrical system. Just basics and you will feel real good when it is all working.
Great ideas have always encounter violent opposition from mediocre minds.
dcbullet
Blue Oval Fan
Blue Oval Fan
Posts: 698
Joined: Fri Apr 01, 2005 6:28 pm
Location: Oceanside, CA

re: Wiring Mess (pics included)

Post by dcbullet »

Problems solved. :D You can check it out in my project update.
Post Reply