|
Sunday, February 8, 2004 - Well I got started about
mid-morning getting the rest of the frame stripped down, and got it
mostly cleaned up in preparation for it's trip to get powder-coated. As
mentioned in my last update, I got the engine and transmission pulled
yesterday, so today's task was to remove the box, front and rear
suspensions, brake lines, rear wiring harness and the multitude of clips
and miscellaneous brackets.
I started
out with the box. The only part of the truck's wiring harness that still
remained was the section for the rear taillights. I snaked the harness
all the way to the back and left it hanging from the rear of the bed.
I've heard many horror stories about how hard the bed bolts were to
remove. In many instances, the carriage bolts holding the bed would be
rusted badly enough that they had to be cut out. I was extremely
fortunate, though...the back half of the truck still had a liberal layer
of undercoating which protected the bolt threads, so all eight bolts
holding the box came right apart. Well, I DID have one snap off
completely, but the others came off like they were just installed. I
laid a small section of carpeting down on the shop floor, and then
lifted the front of the box and very carefully worked it down off the
back of the truck and down onto the carpeting. It's now sitting on end,
where it will stay for a little while, while I'm scraping off the
remainder of the undercoating. NOTE: in the future, make sure you unhook
ALL the wires from the clips holding it to the frame. I forgot to unhook
one clip, and snapped a couple wires while lifting the box up on end. Oh
well...it'll be an easy fix.
At first I
tried to very carefully remove the brake lines...but the years of rust
and wear had taken their toll on the connections. I could NOT break any
of the fitting loose and ended up rounding off the connectors. I finally
just snipped the lines as close to the fittings as I could get, figuring
I'd just add another connector and reflare the ends. However, upon
further investigation, I found a small hole in the rear steel line, just
as it goes into the rear flexible hose. So...it looks like all new steel
brake lines are going to be installed. I decided to not take any chances
with the remainder of these 37-year-old lines.
Next on the
list was the front suspension. I removed the entire assembly as a single
unit, since it was a lot easier this way...and the entire front
suspension will be replaced anyway, from a newer-model pickup with disc
brakes. I had a heck of a time removing the cotter pins from the radius
arms. They were rusted enough that when I tried to remove them they
broke off. I was able to get one to break off flush with the threads
which allowed me to simply spin the nut off, but on the other, I had to
take the cutoff tool and cut into the nut parallel to the threads,
essentially cutting the cotter pin off flush, which then allowed me to
spin the nut off.
I then spent
several hours removing all the various clips, small brackets, etc. I'm
putting everything in it's own ZipLoc bag and marking it as to it's
contents, so I won't have to try to remember all these details several
months down the road. I'm also taking lots of pictures, just to be safe.
Once the clips and brackets were removed I spent some time with a
scraper, a wire wheel and a sander, cleaning the frame up. When this
frame goes in to be powdercoated it will run through an
industrial-strength sandblaster, but the cleaner the frame is when it
goes there, the better it's gonna look afterwards.
|
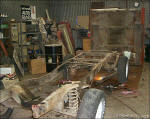
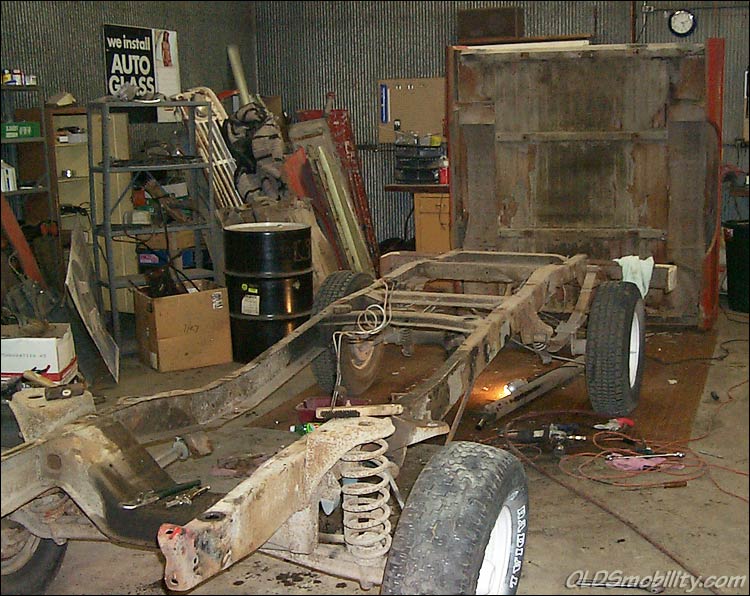
Fig. 1
- Here's a shot taken immediately after removing the box.

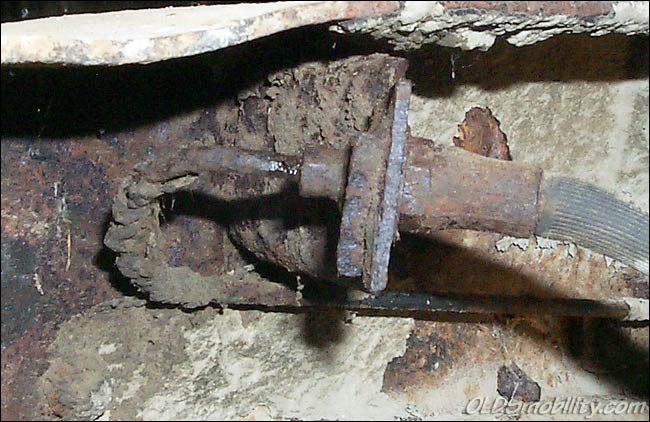
Fig. 2
- When removing the brake lines I found this hole in a steel line by the
rearend. Therefore, all lines will be replaced, just to be safe.
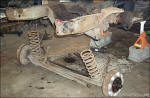
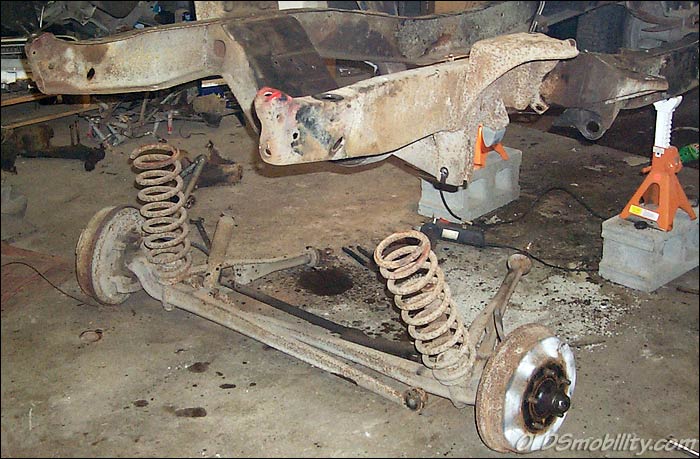
Fig. 3
- I dropped the whole front suspension as a single piece, since it was a
lot faster this way.
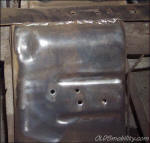
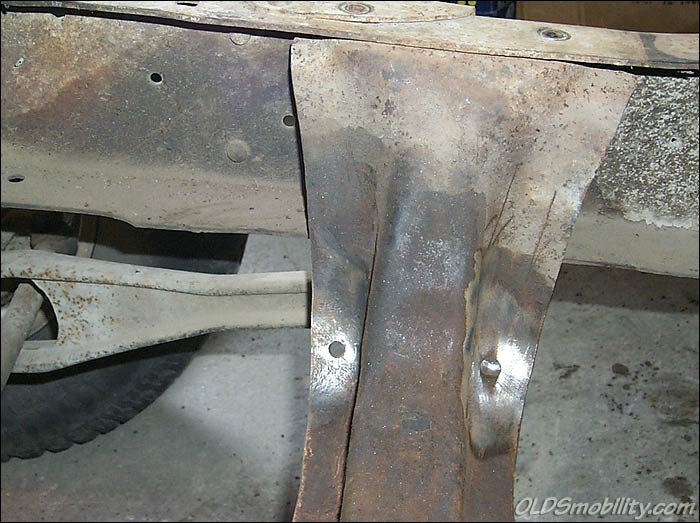
Fig. 4
- Here's a shot of the two sets of engine perch holes. Which holes were
used is dependent on what engine you're using.
|