|


|

Page 06
Getting Some More Work Done |
|
 |

Fig. 01 - Today's supplies |
Saturday,
February 17, 2007 - If you recall from my
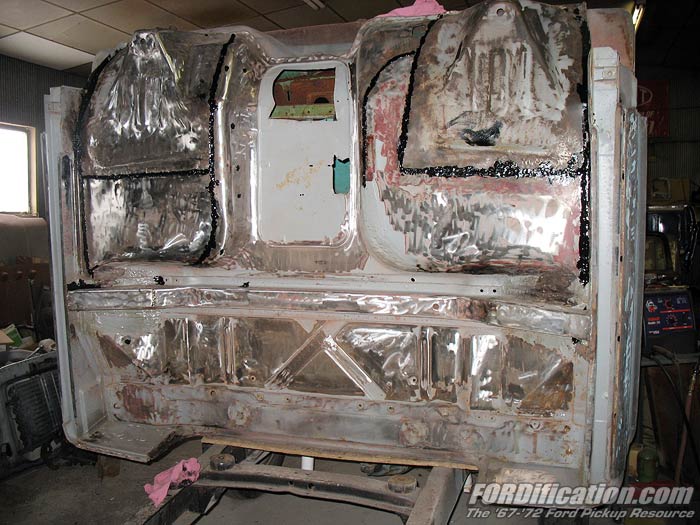
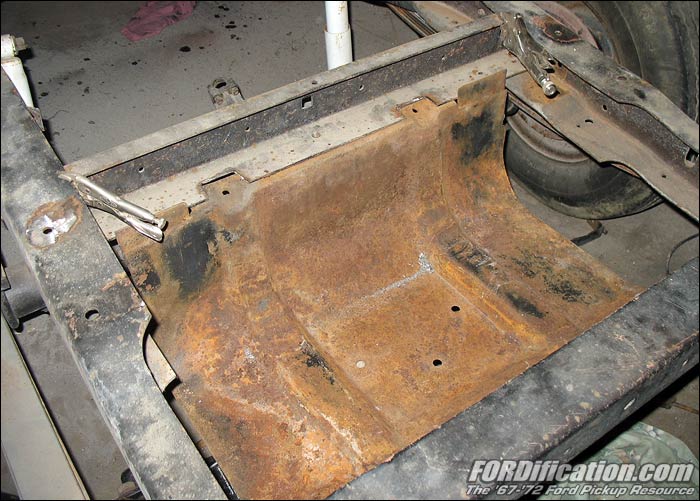
last update, I got the bottom of the cab pretty much stripped
clean and ready to be coated with POR-15, so that was on today's
agenda. When I was last in the shop I found a quart of POR-15
that I'd forgotten I even had, as well as another can of
Eastwood's Rust Encapsulator, so even though I figured I'd
probably have enough to finish this project, I decided to go
ahead and order one more quart, just to be sure. I also ordered
two tubes of POR-Patch, which is basically a thick POR-15 in a
squeeze-tube, which works great as a seam-sealer or for patching
small holes. I decided I wanted to use the POR-Patch to seal up
the seams on the welded-in floorpans and front cab mounts.
Anyway, that shipment arrived several days ago, so I was set for
today's tasks.
There was a little cleanup left to do to get ready for the
POR-15, but not much. Once that was taken care of, I applied the
POR-Patch over the floorpan seams, as well as using it to fill a
half-dozen small drilled holes in the floorpan. If the aim of
this project was a show truck, I'd have welded up the holes and
ground them smooth, but considering the 'rat-rod' angle on this
one, I wasn't overly concerned with making it look pretty....I
simply wanted the holes filled.
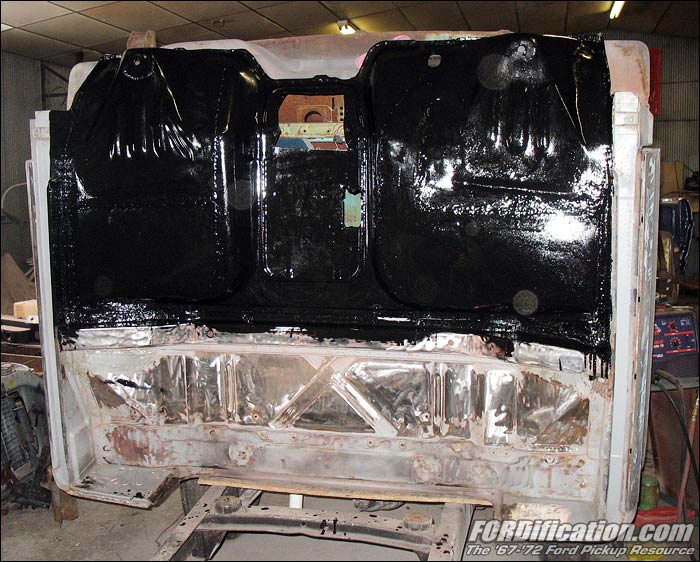
Once the POR-Patch was tacky, I then started applying the POR-15
with foam brushes. Again, where in previous applications of this
on my '67 SWB project I took care not to leave brush strokes, I
wasn't concerned with that on this truck. Even so, the POR laid
down very well, with very few discernible brush strokes. After
the cab floor was completely coated with POR-15 and allowed to
set up for an hour or so, so that it was tacky to the touch, I
then coated the floorpan with several rattlecan layers of Krylon
Semi-Flat Black paint.
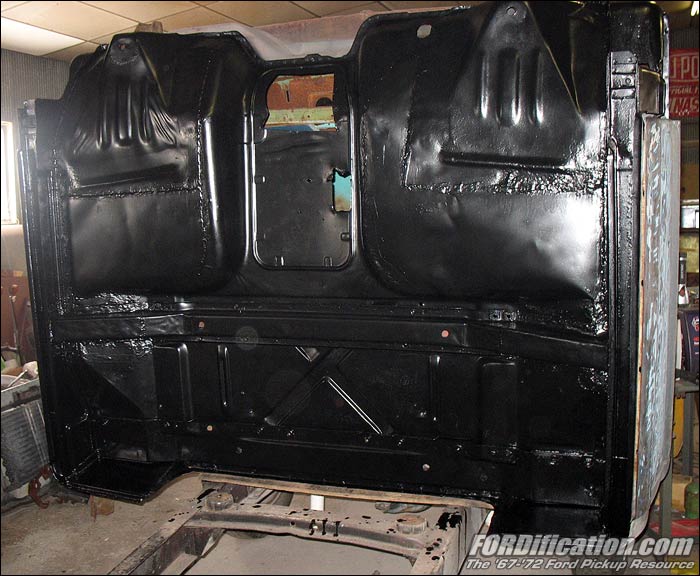
Then I gave everything several hours to get very tacky, I
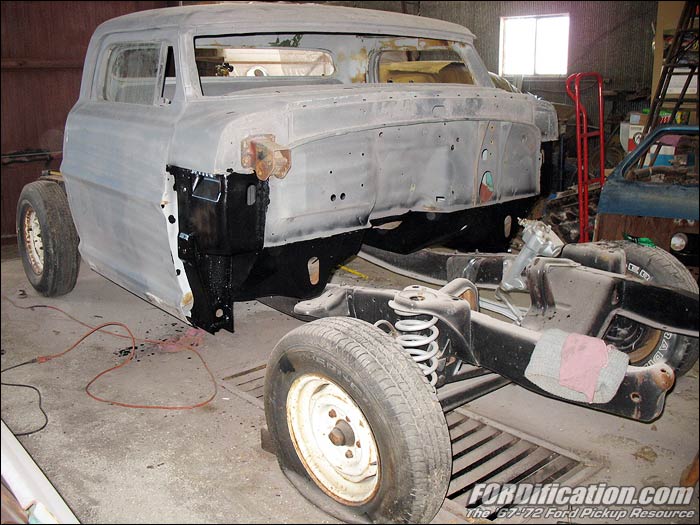
decided to go ahead and carefully lay the cab back down onto the
frame, so that I could get access to the rear part of the frame
for the next task on today's agenda....which was to start the
modifications necessary to install an aft-axle Super Camper
Special fuel tank.

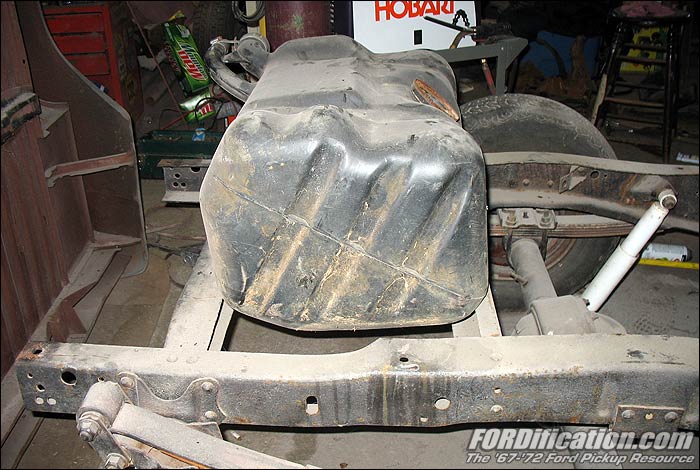
Fig.
06 - A shot of the Super Camper Special aft-axle auxiliary fuel
tank. |
A couple
years ago I sold a pickup box to a FORDification
forum member, who made the drive from Illinois to
come pick it up...and he also came bearing gifts, in
the form of the semi-rare aft-axle auxiliary fuel
tank from a '73-up Super Camper Special. Since the
frames on these trucks retained the same framerail
spacing as the '67-'72 trucks, this tank would fit
very nicely between the framerails under the bed. Or
so I thought..... |
|

Fig. 02 - Using POR-Patch to seal up the seams
Fig. 03 - About half done coating the floorpan with
POR-15
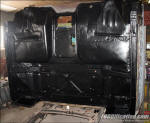
Fig. 04 - Here's the finished product...a good coat of
POR-15 and then several coats of semi-flat rattlecan paint.

Fig. 05 - After allowing the POR-15 to tack up, I then
carefully laid the cab back down onto the frame. |

Fig. 07 - The frame crossmember removed
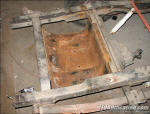
Fig. 08 - A view of the mounting bracket which serves
double-duty as the fuel tank's skid plate.

Fig. 09 - The mocked-up tank shows how it's too tall to fit
under the bed floor.
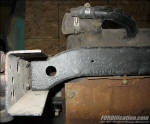
Fig. 10 - A view from the rear. You can see that the crossmember
is angled up. If it were flipped end-for-end to that the crossmember
angled down instead of up, the top of the tank could fit, but it
would still sit too close to the ground for my tastes. |
In Fig. 06 you can see how the tank doesn't quite fit between the
two rearmost frame crossmembers. After assessing the situation, I
decided that the forward crossmember would be the one that would
have to be moved. The rearmost crossmember is strategically placed
by the factory to support the rear spring perch area, and I didn't
want to compromise any frame rigidity. The crossmember was riveted
to the frame, so I dug out the grinder and spent some time grinding
down the factory rivets and popping them out, which would allow me
to remove the crossmember and move it forward several inches.
After getting the crossmember out, I then slid it forward several
inches in the frame and mocked up the mounting bracket, which also
serves as a skid plate for the tank. The tank is actually strapped
to the skidplate with retaining straps and then the tank/skidplate
assembly is bolted to the underside of the frame. In Fig. 08 you can
see the mockup, where I had the skidplate setting on top of the two
crossmembers, just for the visual...and for marking the necessary
mounting holes in the crossmembers. I went ahead and centered the
skidplate between the framerails and then drilled the holes in the
rearmost crossmember and bolted it down to hold things still while I
positioned the forward crossmember.
However, I made a very disappointing discovery when I dropped the
tank down onto the skidplate:
IT'S TOO
TALL! It's not going to fit under the bed!
It never even dawned on me that the tank would be too tall to work.
You can see the problem in Fig. 09. With the tank sitting down on
the skidplate, the tank is a full 5½" above the framerail. Yes, I
COULD add some dropdown brackets to lower the tank and skidplate,
but that would put it VERY low to the ground...too low. In
fact, the bottom of the skidplate would almost be even with the
bottom of the differential! And after taking a lot of measurements
(something I suppose I should have done before getting started on
this phase), I found that I simply can't lower it enough for the
filler neck and vent tube to adequately clear both the rearmost
frame crossmember and box. Just out of curiosity I'll have to see if
I can find a Super Camper Special so I can see how the rearmost
crossmember is different to allow proper clearance. I believe the
difference is how the rearmost crossmember is angled. Mine is angled
up and would contact the filler neck and vent hose, but if it was
flipped over so that it angled down, it could conceivably
fit...although it would still be WAY too low.
Therefore, after MUCH pacing and a full hour's worth of thought, a
decision was made. If this was my '67, the one I'm fixing up to be a
very nice daily driver, I'd scrap the idea of using this tank. But
in the spirit of the 'use what you got' philosophy of this
particular project, I'm going to be cutting a hole in the bed to
clear the tank, and then boxing it up on top. Since this truck is
strictly a fun cruiser and will never be used to haul anything, and
since the bed will be covered with a tonneau cover that'll rarely be
up anyway, the bed floor modifications will be completely hidden, so
I decided that this is the best choice for this particular project.
After all, it's not like anything else has been chopped on this
truck, right? ;) |

Fig. 11 - Shown are the notches in the forward crossmember to
clear the tank retaining straps. |
So anyway, I then continued with the mounting of the tank and
skidplate. As shown in Fig. 11, I had to notch the forward
crossmember to clear the tank hold-down straps. I then carefully
measured and centered the crossmember and used Vice-Grips to clamp
it into place so that I can mark and drill the necessary mounting
holes in the frame and the crossmember.
This was as far as I got today before having to head home. All
that's left is drilling 8 holes to bolt the crossmember to the frame
and four more for attaching the front of the skidplate to the
crossmember. |
|
By the time I make it back to the shop for another
session, the POR-15 on the cab's floorpans will be fully
cured, so I'll be able to get the cab bolted down
solidly. Then I'll be getting started on stripping and
coating the firewall in the same way. I haven't yet
decided if I'll be giving the bottom of the bed the same
POR-15 treatment, but I probably will, since I have more
than enough. However, since this truck will more than
likely spend it's life indoors and won't be driven in
the wintertime, I don't have to worry about road
salt...and since the bottom of the bed is in primer now,
I might just leave it alone. I haven't decided for sure
yet.
Stay tuned....as things are going to get interesting in
the near future! |
|
|
 |

Want to link to
this site? Please save this banner to your hard drive to place on your
webpage.
The correct link to use is
http://www.fordification.com
|