|


|

|
|
|
How
to Completely Disassemble a Door |
|
|
 |
|
This
in-progress multi-page tutorial is designed to answer questions
regarding your truck's doors. There's a ton of close-up shots
here to show details, and for the purpose
of these photographs, the doors were already removed from the
truck. |
|
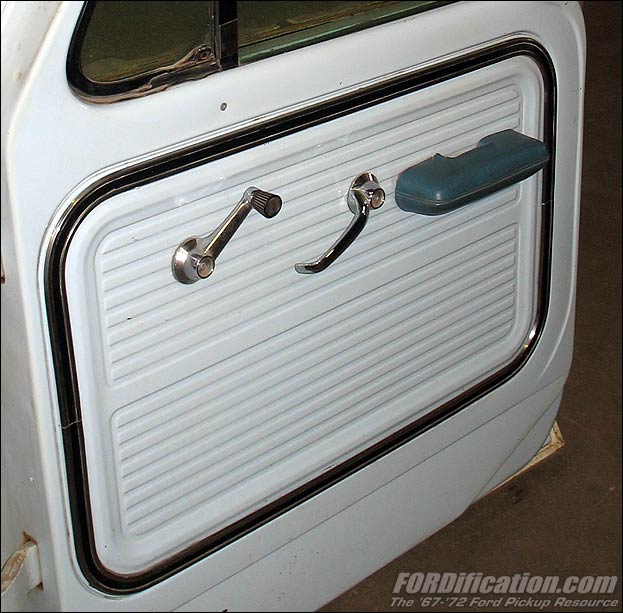
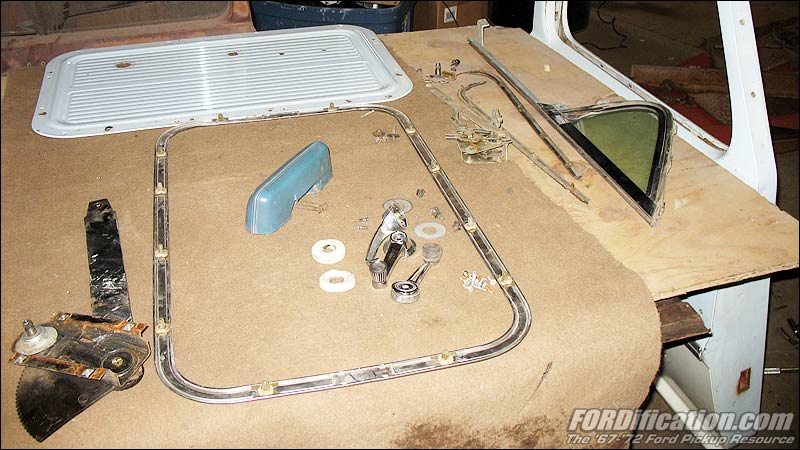
Step 1: Remove the door panel perimeter trim |
Here's a view of the '67 door we'll be starting
with. You can see the door panel has snap-on
perimeter trim which must be removed to gain access
to the door panel screws. If your door doesn't have
this trim, you may skip to Step 2.
Fig. 01
|
 |
 |
|
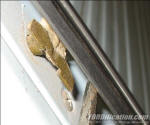
Fig. 02 -
Lifting up a section of the trim
with a screwdriver. You should use a
shop rag between the door and
screwdriver to prevent scratches. |
|
|
 |
|
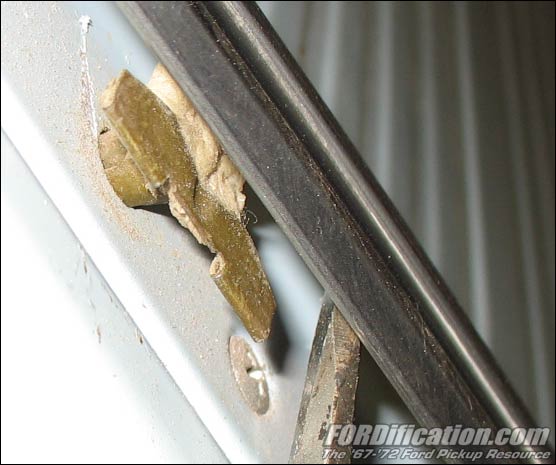
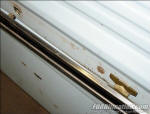
Fig. 03
-
Sometimes the retaining clip will
come off with the trim, other times
it'll stay in
the door and can be removed after
the trim is completely removed. |
|
 |
|
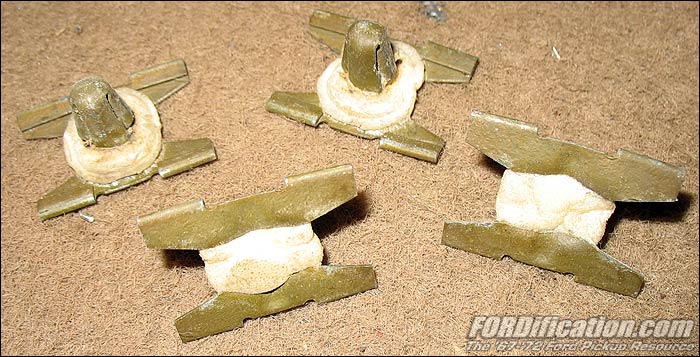
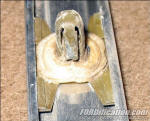
Fig. 05
-
The clips are
filled with spray-in expandable foam, to help
with vibration/rattle control and to keep
them tight inside the trim lips. |

Fig. 06 |
|
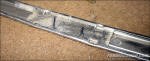 |
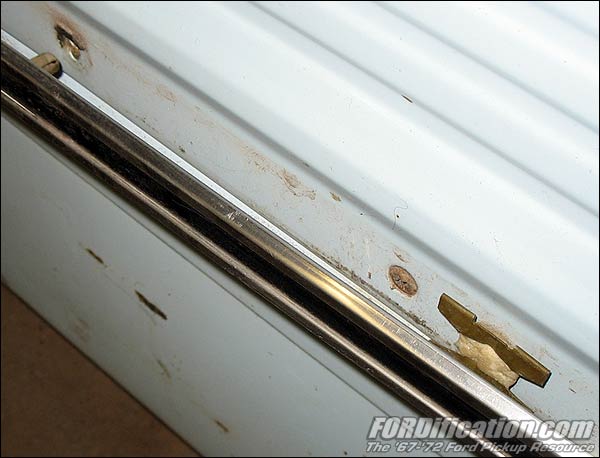
Fig. 04
-
The upper and lower pieces are slid
over this connector along the sides
and then crimped into place. To
separate the two you'd need to
carefully uncrimp the trim. |
|
|
|
Step 2: Remove armrest, window crank and door release |
|
1967 |
1968-1972 |
 |
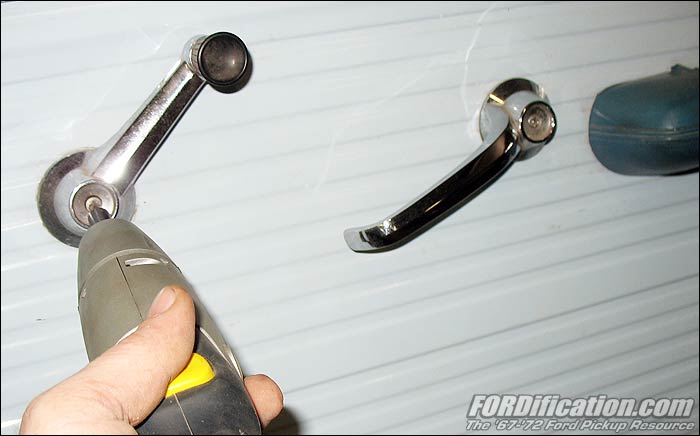
Fig. 07 -
The door release handle and window
regulator handle are attached with chrome
Allen-head cap screws, unless a previous
owner has replaced them with Phillips-head
screws. |
|
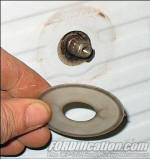 |
Fig. 08 -
Door and window handles have plastic wear
guards, on '68-up doors only the window
crank has these wear guards (obviously). The '67 style
is completely flat, whereas the '68-up style
is cupped and will not fit the '67 door
release handle. |
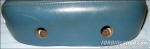 |
Fig. 09 -
The armrests are attached with two
Phillips-head screws. |
|
|
You'll need to remove the armrest to gain
access to the door release handle. The armrests
are attached with three 3/8" cap screws and
should be removed with a nut-driver. You can use
a deep-well thin-wall socket, but it'll probably
get stuck in the armrest and will be a PIA to
remove. |
|
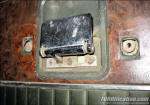 |
Fig. 10 -
Use a nut-driver to remove the two small nuts
holding the release handle to the door panel.
Remove handle and scratch cup. |
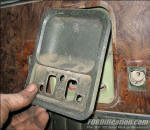 |
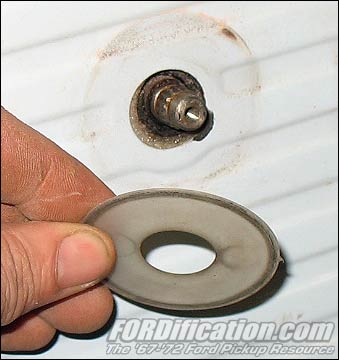
Fig. 11 -
The scratch cup has flanges on top which hold it
to the door panel. Grab the bottom of the cup,
pull down and out. |
|
 |
|
 |
|
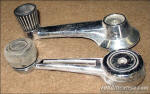
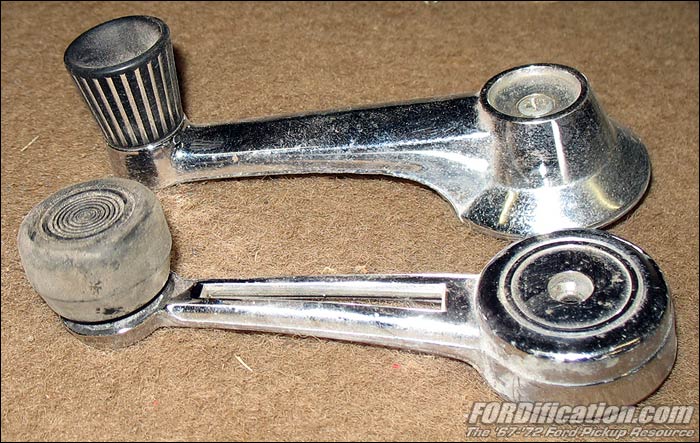
Fig. 12 |
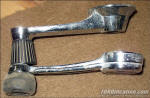
Fig. 13 |
|
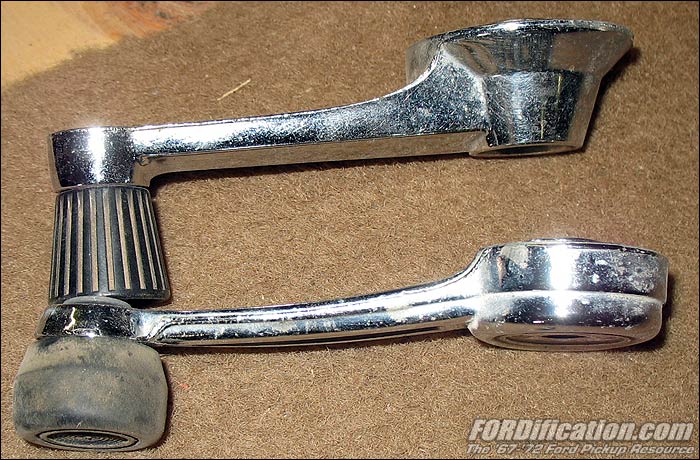
In both of these photos the '67-only window crank
handle is on top, while the '68-'72 style, which is
missing the self-adhesive aluminum cover for the
hold-down screw, is on bottom. The '68-up handles
were redesigned to be more shallow (not protruding
out as far into the cab), per new '68 Federal safety regulations. And
yes, they are fully interchangeable with each other. |
|
|
|
|
Step 3: Remove door panel |
|
This process is shown on a '67 door but is the same for all model
years. |
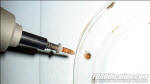 |
Fig. 14 -
Remove the 12 hold-down screws.... |
|
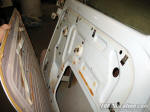 |
Fig. 15 -
...and then remove the door panel. Note the
presence of the Styrofoam seals around the
door release and window crank hardware. |
|
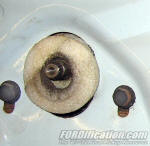 |
Fig. 16 -
A close-up of one of the Styrofoam seals. In
many (most!) cases these are falling apart or
missing completely. |
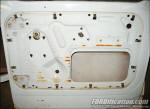 |
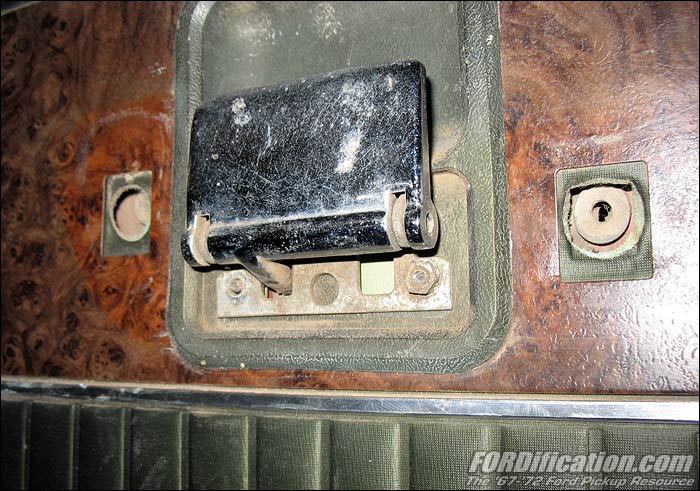
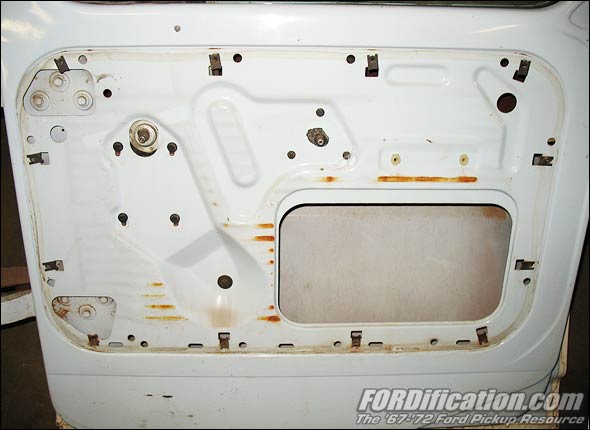
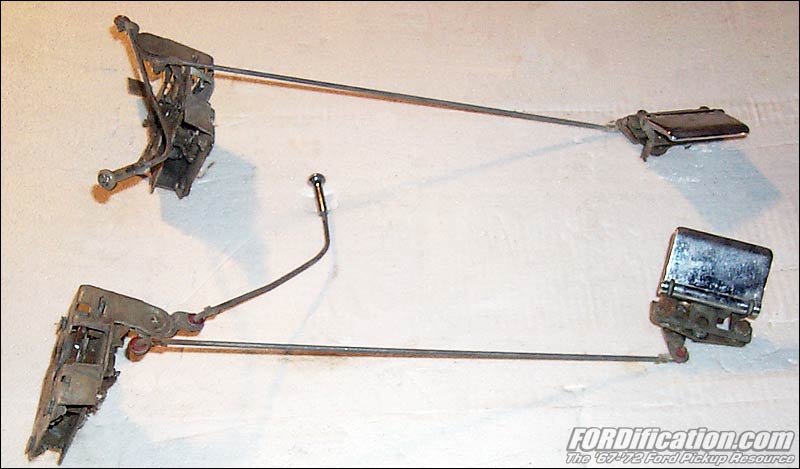
Fig. 17 - With the
door panel removed you can now begin
removing the internal hardware. Here is the
'67 door...
Fig. 18 -
...and here is the '68-'72 door. I got a little ahead of myself in
this picture, the door release hardware has
already been removed but I included the
picture for comparison purposes. |
 |
|
NOTE:
Please be careful during the next step. The
edges of the access hole under the door
panel (through which you'll be removing the
door's interior pieces) can be sharp. It
might be a good idea to take a moment and
cover the edges with masking tape or duct
tape, just for a little protection against
cuts. |
|
|
|
Step 4: Remove door release mechanisms |
|
1967 |
1968-1972 |
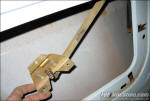 |
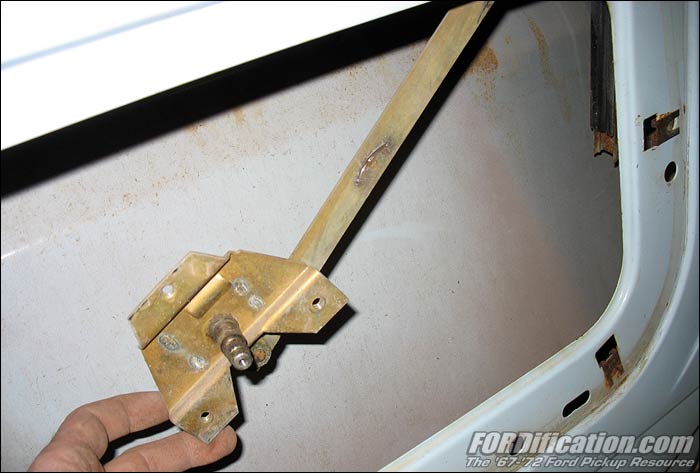
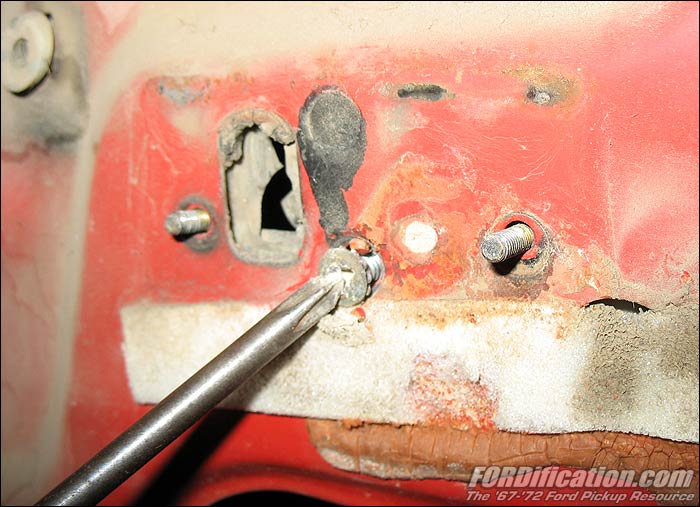
Fig. 19 -
Remove the three small bolts holding the
door release, push in a little and swing it
down as far as it'll go, up against the
front of the door... |
|
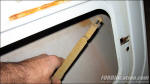 |
Fig. 20 -
...and then pull towards you to release the
mechanism from the door latch. You can also
just leave it attached to the door latch,
and remove it and the latch as an assembly. |
|
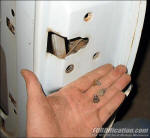 |
Fig. 21 -
Then you can remove the three Phillips-head
screws holding the door latch mechanism in
place. These might be rusty, so be careful
not to booger up the head of the screw. A
small impact driver works well here to
remove stubborn screws. |
 |
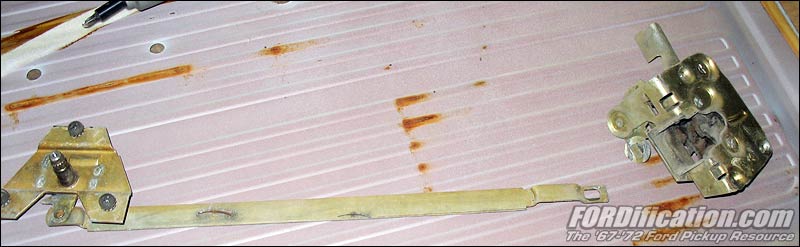
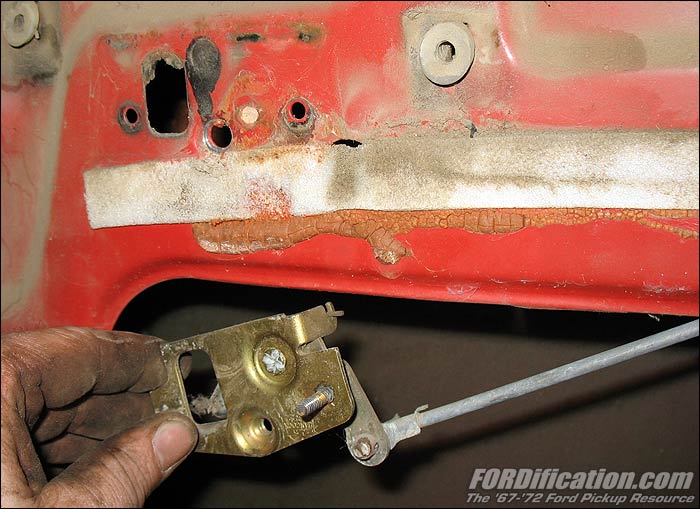
Fig. 22 -
Here's the removed release mechanism and
latch. |
|
|
|
|
|
Step 5: Removing the window regulator |
|
This process is the same for all model-year
doors. |
|
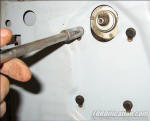 |
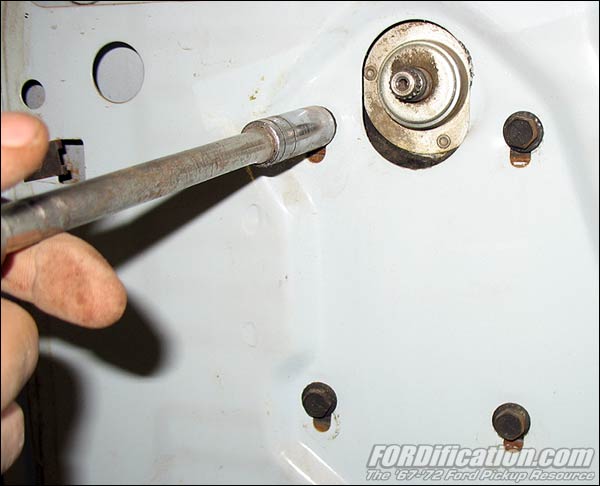
Fig. 27 -
Remove three of the four bolts holding the
window regulator to the door. As you begin
to remove the final bolt, reach inside the
door and grab the bottom of the glass. Once
the last bolt is removed you can carefully
drop the regulator and glass down to the
bottom of the door. |
|
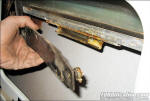 |
Fig. 28 -
Grab the glass with one hand and the
regulator with the other, and slide the
regulator off the glass channel. Remove the
regulator from the door and carefully let
the glass down as far as it'll go. It's
still in-between the front and rear channels
at this point, so it won't drop all the way
to the bottom of the door...yet. |
 |
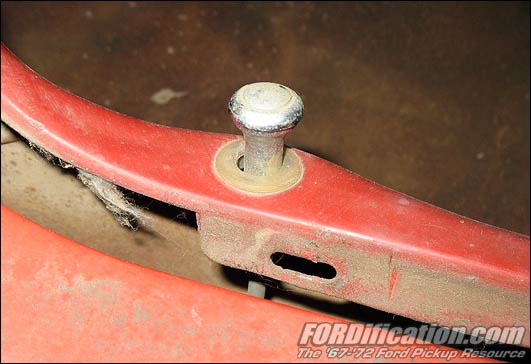
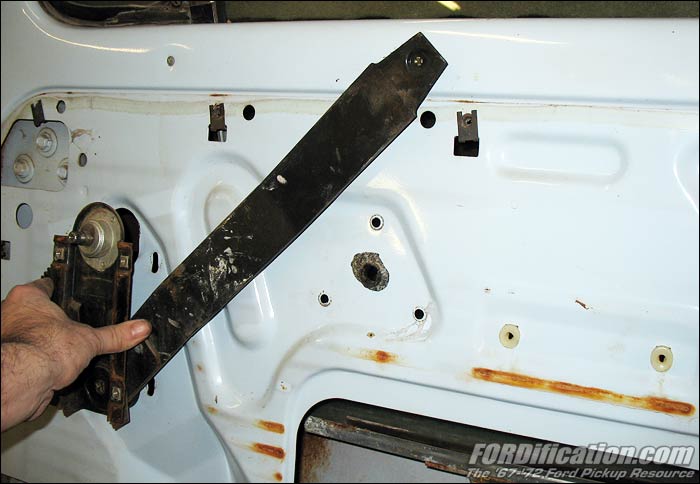
Fig. 29 -
This is just a reference photo, to show you
how high up inside the door the window
regulator goes when in the full-upright
position. |
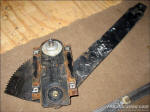 |
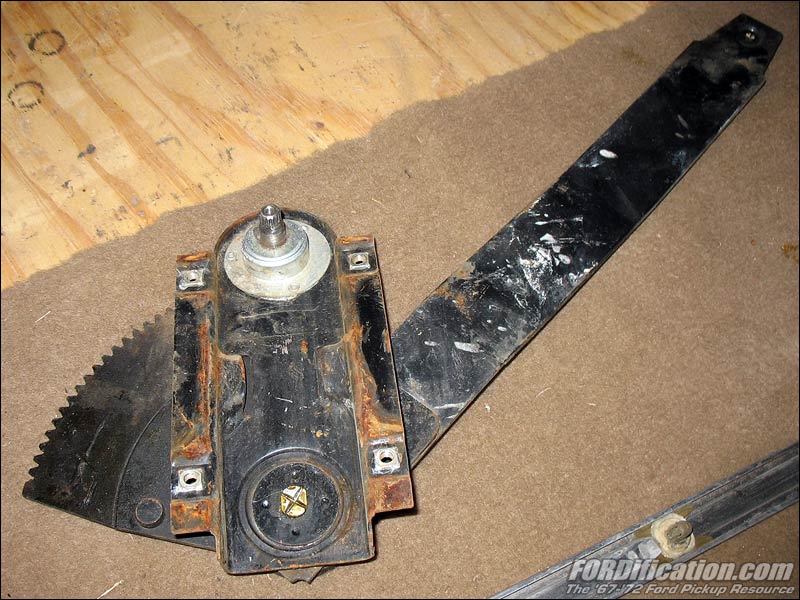
Fig. 30 -
Here is the removed R/S window regulator.
These are identical for all '67-'72 F100
thru F350 trucks. |
|
|
|
Step 6: Remove the door 'fuzzies' |
|
This process is the same for all doors. The
window 'fuzzies' need to be removed before
attempting to remove the glass and vent
window assembly....there won't be room at
the top of the door to do otherwise.
Don't even think about trying it, and don't
worry about trying to save them for re-use. |
|
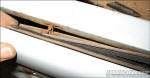 |
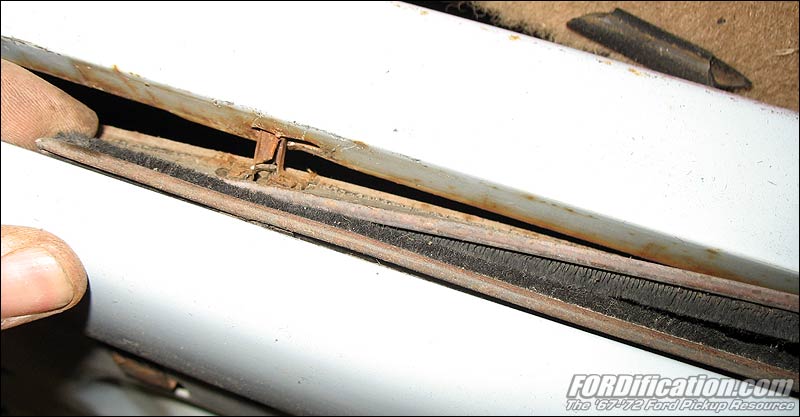
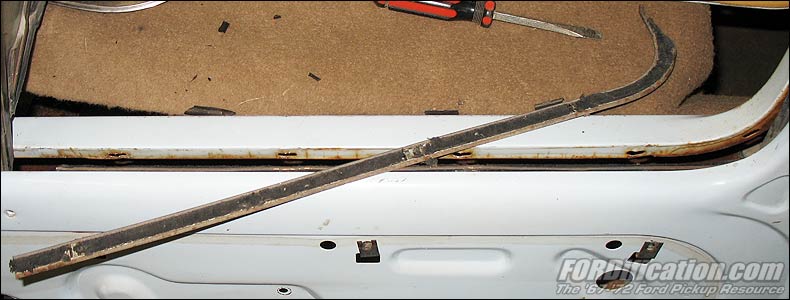
Fig. 31 -
Starting at the front of the door by the
vent window assembly, pry the door fuzzies
out. Be very careful here not to use too
much force. This process needs the most
patience, because the clips holding the
fuzzies are impossible to remove without
destroying, but when trying to pry them out
you also run the risk of damaging the door
frame where the clips insert. Take your time
and just pry a little on one side, then a
little on the other....and slowly work them
out. |
|
 |
Fig. 32 -
The first of the two fuzzies is out....and
without too much damage to the door frame.
However, the holes for the clips will have
to be re-flattened, since this area needs to
be totally smooth for the new door fuzzies. |
|
|
|
Step 7: Remove the vent window assembly |
|
This process is the same for all doors.
NOTE: The
vent window assembly is also the forward
glass channel, so be careful when removing
this. Once the assembly is unbolted from the
door, the glass will want to drop. Be sure
it's supported! |
|
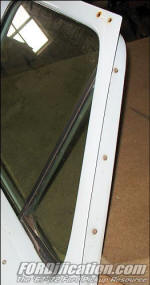
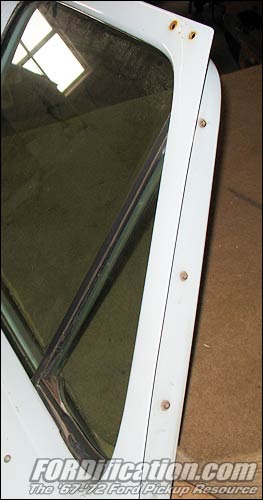
Fig. 33
|
LEFT: Start by removing these three
Phillips-head screws along the upper forward
section of the window frame.
RIGHT: Then remove the Phillips-head screw
supporting the middle of the assembly, just
below the vent handle. (You can see that my
vent handle has been broken off in this
picture.) |
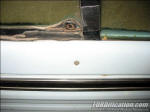
Fig. 34 |
|
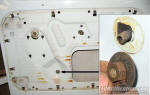 |
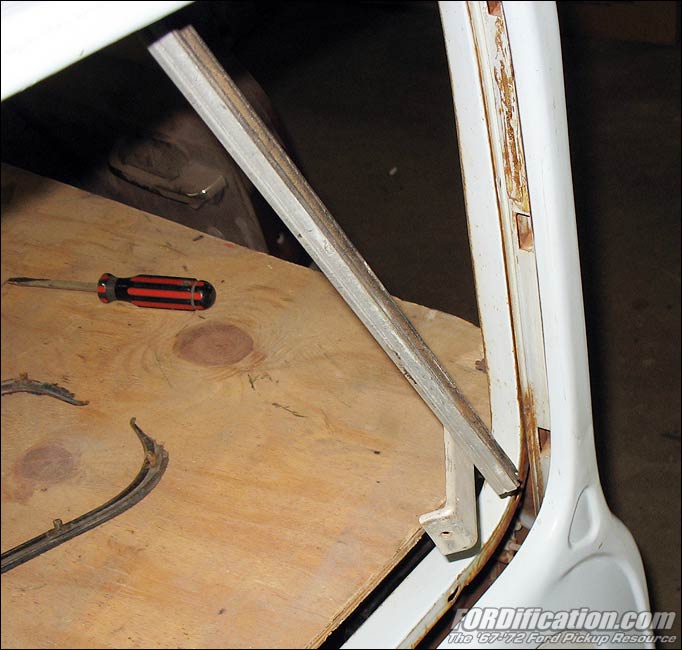
Fig. 35 -
Then remove the locknut holding the lower
vent window assembly's window channel. Be
sure to grab the window glass and hold on
with one hand, while you push in on the
channel to allow the set-screw to clear the
door, and then forward, to pull the channel
off the door glass. Gently lower the glass
down to the bottom of the door. |
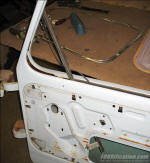 |
Fig. 36 -
The setscrew will have to be removed from
the window channel to permit it's
extrication. Go up to the top of the door
and pull the vent window assembly away from
the door frame, and then maneuver the
assembly to allow easy access to the
setscrew through the door's main access
hole. |
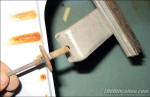 |
Fig. 37 -
Use an 1/8" Allen wrench to remove the
setscrew, and then... |
 |
Fig. 38 -
...slide the vent window assembly's runner to
the rear of the door and lift out. |
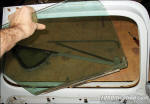 |
Fig. 39 -
Then go ahead and feed the door glass up and
out of the door shell. |
|
Step 8: Remove outside door handle and lock cylinder |
|
This process is the same for all doors. All
'67-'72 outside door handles and lock
assemblies are identical and
interchangeable. |
|
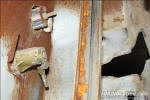
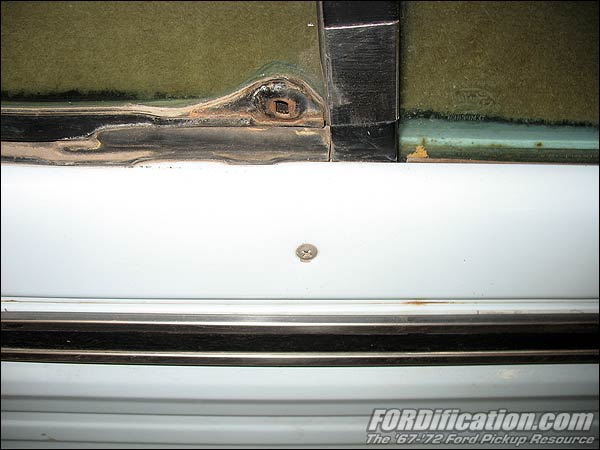
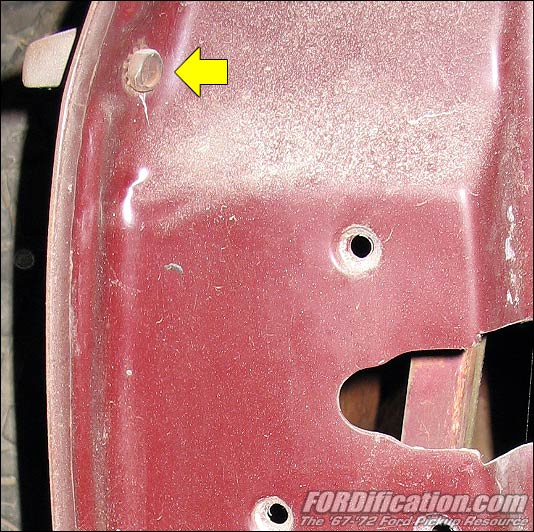
Fig. 40 |
LEFT:
Use a flat-bladed screwdriver to remove the
lock cylinder clip. Push the lock cylinder
out the front of the door. To remove the
door handle, you'll need to remove one 1/2"
nut (hiding behind the white glob in this
picture) and one 1/2" bolt on the rear door
face (shown at right). |

Fig. 42 |
|
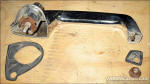
Fig. 41
|
LEFT: Here's a shot of the removed door
handle assembly and the gaskets. You can see
that the door button can be accessed by
removing the two Phillips-head screws.
RIGHT: This is a disassembled door handle
assembly. (Don't lose the small O-ring for
the button.) The buttons often develop holes
on the outer face, right where you push it
with your thumb to open the door. If you've
got good chrome on your handles but have a
bad button, you can easily find one in a
salvage yard and just swipe the button, if
the donor truck's handle is pitted and
unusable. |
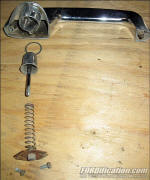
Fig. 43 |
|
Step 9: Remove the door hinges |
|
This process is the same for all doors. All
'67-'72 door hinges are identical and
interchangeable. Each side is different from
the other, and there is a top and bottom
hinge. |
|
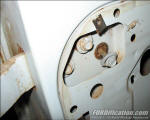
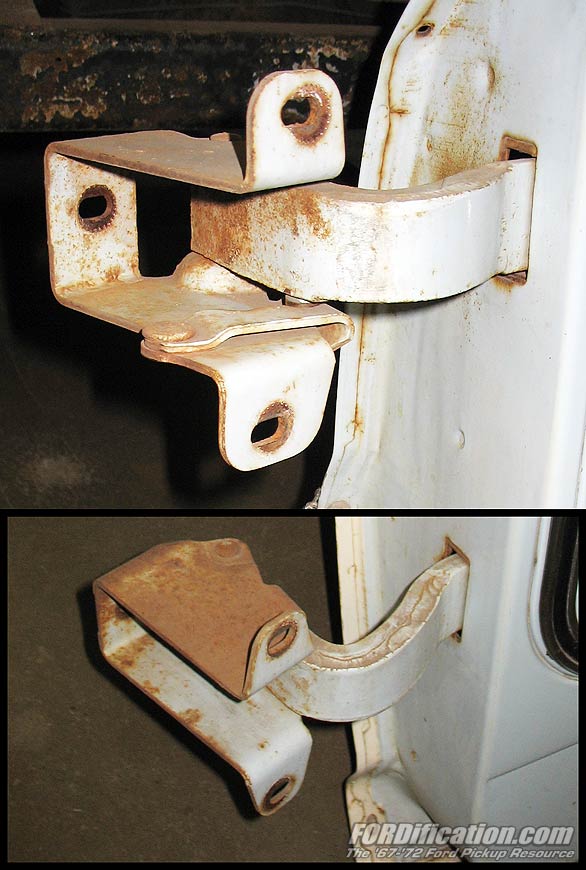
Fig. 40 |
LEFT: Scribe the location of the three hinge
bolts or mark with a pencil and then
remove.
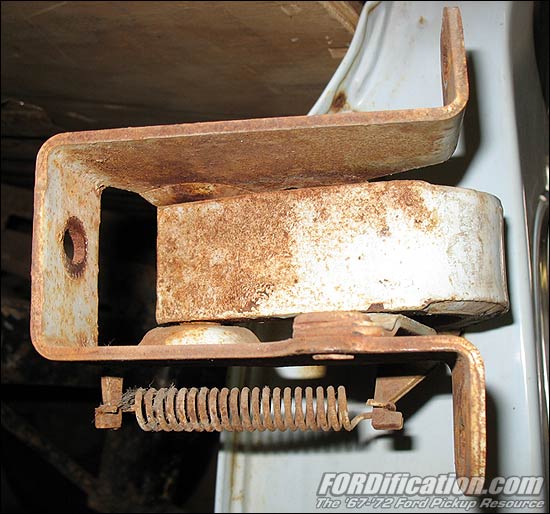
RIGHT: Slide the hinge out of the hinge cage
and
replace the bolts in the hinge to keep
track of them. |
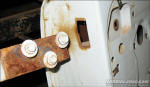
Fig. 42 |
|
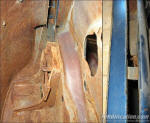
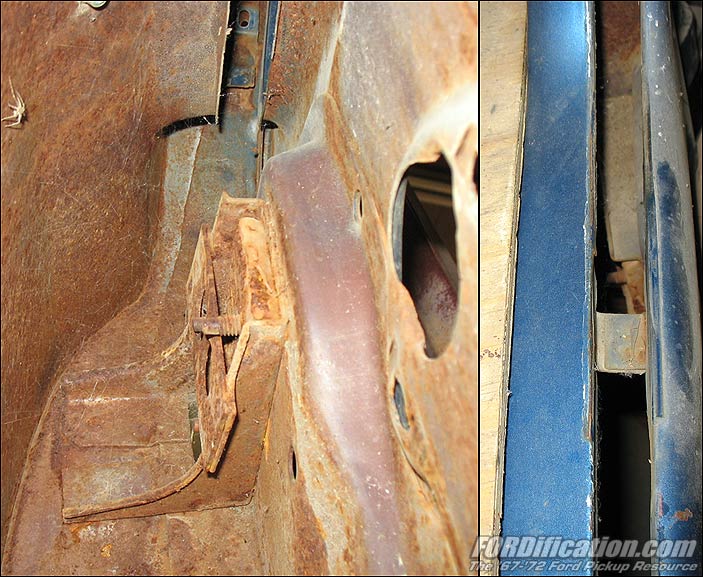
Fig. 41 |
LEFT: The left part of this picture is a view
from the door's main access
hole, looking up towards the hinge area. The
right part of the picture is looking down
through the window slot from the top of the
door. You can see the hinge cage to which
the hinge is bolted. You can also see that
it's directly in line with the window, so
installing one-piece glass would be
extremely difficult. The entire door hinge
would have to be relocated for clearance.
RIGHT: Two views of the same hinge
cage from the outside the door, looking in. |
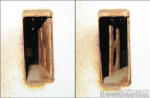
Fig. 43 |
|
|
|
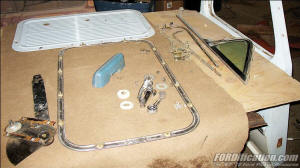
Well, there you have it....
...your door is now completely
disassembled into sub-components. |
 |
|

COMING SOON! |
Well, that's it for now, folks....what
you've just browsed through is what I have
so far. In the near future I will be adding
to this section with additional pages, to
include the following:
-
Photo-documentation of the correct
mounting locations of the various style
of door-mounted rear view mirrors. This
will include the sport mirror, the
two-point Jr. West Coast (SwingLoc)
mirror, the three-point Camper Special
mirror, and the three-point tripod-style
mirror.
-
Disassembly of the vent window
assemblies
-
A collection of miscellaneous reference
photos, useful for parts identification
or reassembling the many pieces after a
complete teardown.
|
|
|
|
 |

Want to link to
this site? Please save this banner to your hard drive to place on your
webpage.
The correct link to use is
http://www.fordification.com
|