|
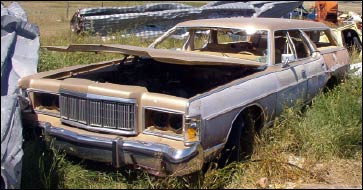
Wandering the wild country one day, I stopped in a small town to
acquire some fuel and liquid refreshment, and discovered the
scrap metal dump just outside town. In amongst the derelict
refrigerators and lawn mowers was a 1976 Mercury Grande Marquis
Station Wagon (Fig. 01). Ah Ha says I, maybe a source of some
useful parts. Lift hood and voila! A stock Ford Hydroboost unit
intact. Being resourceful and always carrying a tool box with me
(the wife calls it the 'steal-and-strip kit'), the unit did not
reside in the station wagon for long.
I
removed from the station wagon the Hydroboost unit, the master
cylinder, the power steering pump (A Saginaw with dual returns!)
and the power steering pump brackets. Retiring back to the town
office, I enquired as to who I would reimburse for the parts I
acquired. All I got was a funny look, and "There yours now,
don’t bother us with it". Price every Bronco owner likes, FREE!!
Home I go with my new goodies and stop at the car wash to give
them a bath. They look brand new. Disassembled the Hydroboost
unit and discover it is virtually new. The master cylinder is in
average condition and the power steering pump is in above
average condition, what a score!
Got
on the internet and discovered that Ford did put Hydroboost
units into some of their cars back in the 70’s. The big Mercury
cars got them and some of the Mercury Monarch Ghia vehicles got
them in the 74 to 79 time frame. A lot of browsing showed that
no one has installed any of this particular unit in any other
vehicle and only one site knew that Ford installed these in the
above cars. Interesting fact.
Talked to the wrench benders at work, and discovered I did not
need HP hose to install it, simple brake line is more than
sufficient. The only connections that need flexible hose
connections were the 2 connections to the power steering pump.
This project is really beginning to make me happy.
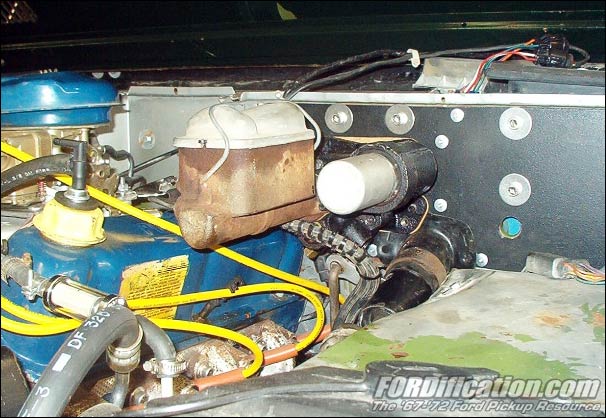
Removed the old vacuum boost unit off the firewall. What a large
piece of metal that disappeared. A quick test fit of the
Hydroboost unit showed I would have to install it turned 180
degrees. Not an issue, says the mechanics, some installs are
that way from the factories.
Now
to the installation, some quick looks and some calculations
showed I needed some 3/8” line some 5/16” line, unions for both,
and some brass fittings to adapt this to the Bronco. Here is
what I bought:
-
4 lengths of 30" x 3/8" brake line ($5.23/ea. - total
$20.93)
-
4 lengths of 30" x 5/16" brake line ($4.86/ea. - total
$19.44)
-
2 brass unions 3/8" size ($2.09/ea. - total $4.18)
-
1 brass union 5/16" size ($2.29 each - total $2.29)
-
1 90-degree 5/16" inverted flare to 1/8" pipe fitting
($1.89/ea. - total $1.89)
-
1 90-degree 3/8" inverted flare to 1/8" brass fitting
($2.29/ea. - total $2.29)
-
1 package of 3/8" inverted flare nuts ($1.99/ea. total
$1.99)
-
1 brass 3/8" tee fitting ($5.16/ea. - total $5.16)
-
1 5/16" threaded rod connecting nut (.49/ea. - total .49)
Total $58.66
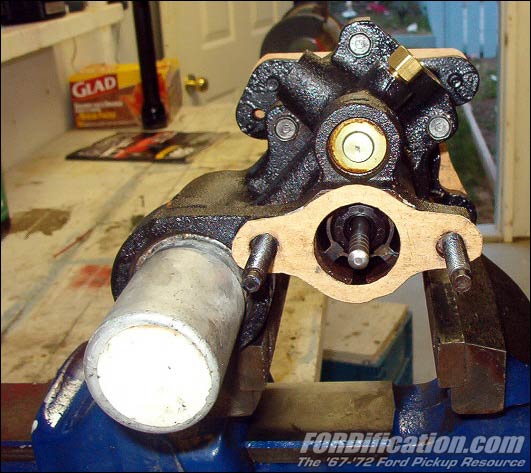
Took
Hydroboost unit apart, cleaned all the accumulated dirt out of
it, painted the unit and made a couple of gaskets out of some
spare gasket material I had, using the old ones as patterns.
Promptly lost the LP (low pressure) fitting to the unit. Rats,
hate it when that happens. No great thing, it was a straight
fitting and I needed a 90 degree unit to clear my valve covers
anyway. Soon discovered that the threads were different in the
unit as compared to my brass fitting I was using. A quick talk
with the mechanics and I was told to tap the unit for the pipe
threads and ensure that the filings were all out of boost unit.
Did
this, took several minutes to get the filings out of unit. Free
hint, if you are doing this with yours, put a clean rag in the
bore of the unit and then thread it. Saves a lot of work!
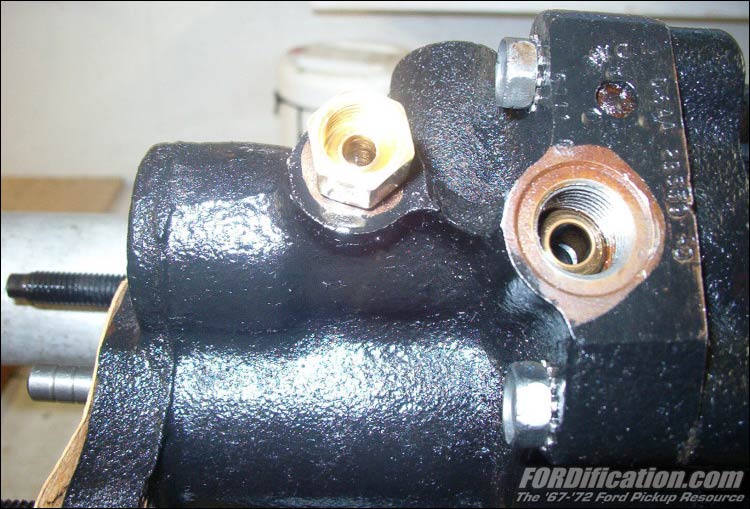
Now,
I needed a 90-degree fitting for the HP (high pressure) line to
the power steering pump. Made this by taking one of the 3/8"
inverted flare nuts and the 90-degree 3/8" fitting and threading
the nut to 1/8" pipe threads. Clamp the nut into a vice, thread
the inside of the nut for pipe thread, clean both the nut and
fitting thoroughly with alcohol, put a little JB weld on the
threads of the 90-degree fitting and thread them together. Set
the aside to allow the weld to set then thread this into the
boost unit aligning it to point straight across the unit like
the LP fitting. At this point, told the guy at work what I was
doing and he gave me a Number 2 lecture about JB Weld and Brass.
It will leak. He took my spare two fittings and brazed them
together. Tossed them at me and said "There, that won’t leak,
and don’t you ever do a backyard two-bit job again or I will
take away your birthday". Could not argue with him, smiled
sheepishly and said "Yes Master, please forgive your lowly
student for his blundering". We parted ways laughing like hell.
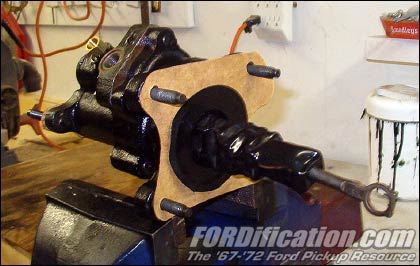
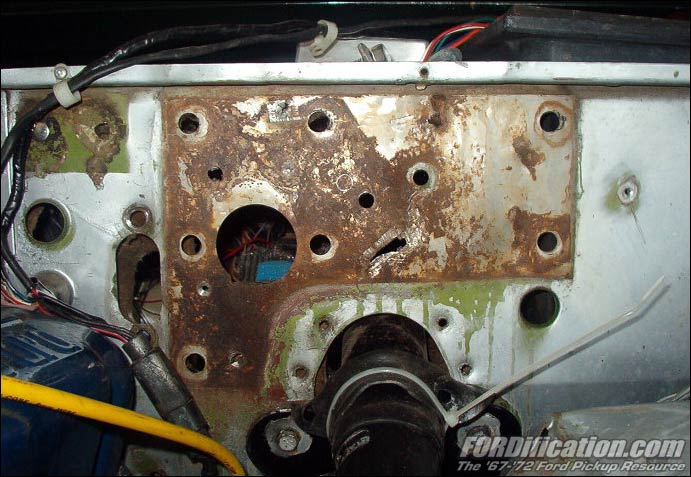
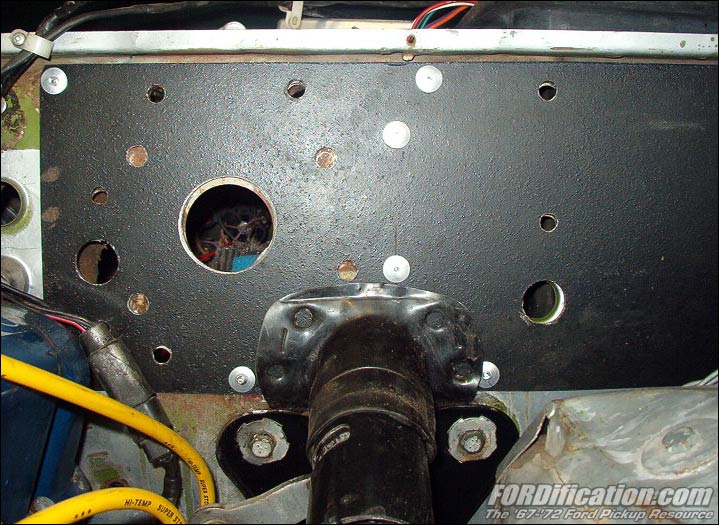
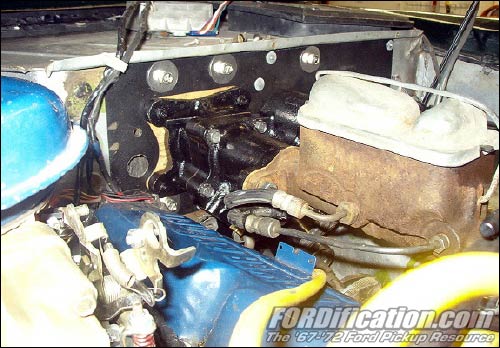
Went
to bolt in the Hydroboost unit and discovered that the bracing
plate on the firewall appeared to be a little loose. Man do I
love previous owners; pictures show the butcher job done to the
firewall behind the old boost unit. One look at this mess and I
promptly went for a beer and a day off this job to think about
it. The next day, took some scrap plate I had, made a new
bracing plate and drilled it to fit on the firewall. Painted it
and pop-riveted the plate in place while it redrilled all the
holes in the plate to match the firewall. I had some unique
language for the PO and his mechanics skills at that point. Oh
well, a small setback the job which had been going too well at
this point. Also gave me a firmer mounting for the boost unit as
it has 4 holes for mounting and the original only has 2 holes
for mounting. And, of course, not one of them lines up.
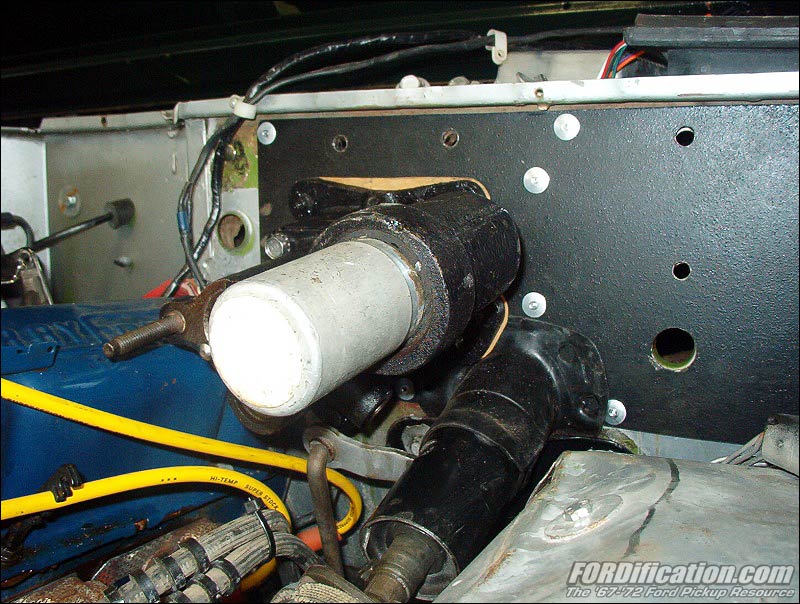
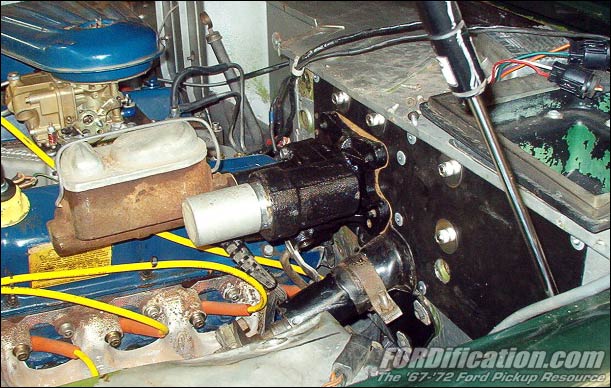
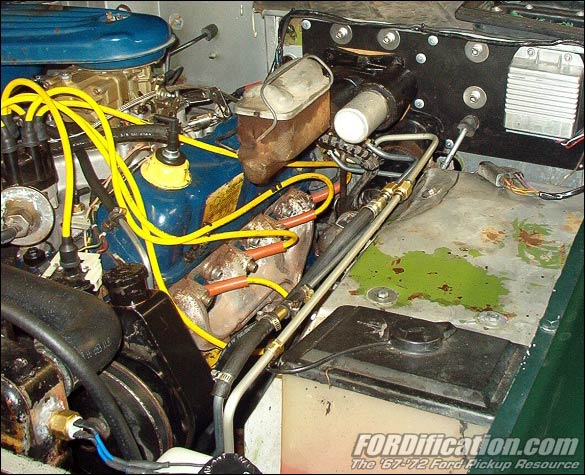
Bolted up the Hydroboost unit, fit like glove, put on my old
master cylinder, and bolted it up. Man, this is going too
smoothly, something is wrong!
Crawled under the dash to connect the brake rod to the boost
unit and found out what was wrong. The rod was too short. Out
came the unit and I cut the push rod and lengthened it with the
threaded rod coupler in the parts list. Pictures of this, we
have all done it and if you haven’t it is a straight
cut-and-thread operation. Back the unit and MC went and it
connected up perfectly and the brake light switch. The brake
light switch even works. Yahoo, bonus, no screwing around with a
brake switch. Took the time to service the pivot point for the
brake arm and paint the bracket.
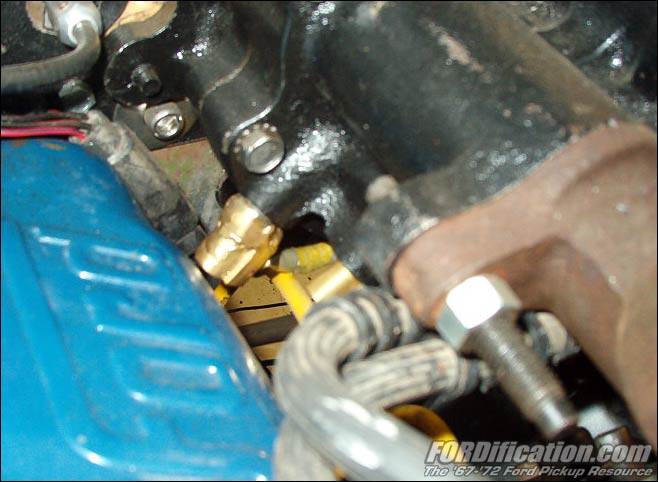
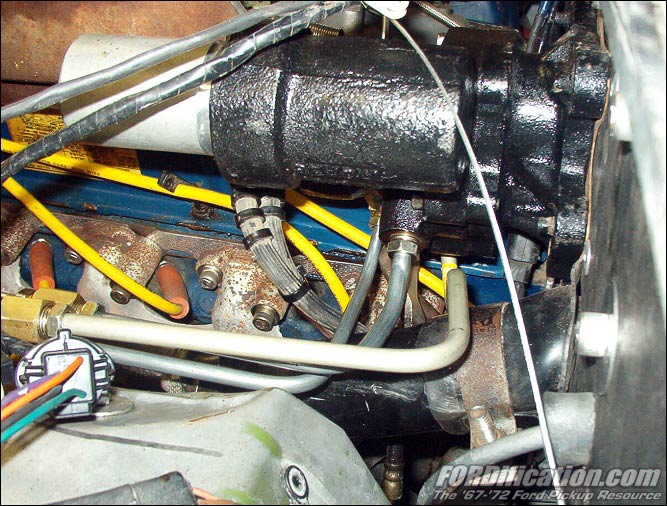
Back under the hood, and started with the LP line to the power
steering box. Using a tubing bender (most important, do not bend
brake line without one.) I bent up the line from the boost unit
to where I was going to tee into PS pump. This involved three
bends and several extremely descriptive words to get right.
Double-flared the connection to the boost unit and connected it
up. Next was the LP line from the steering box to the tee
fitting. Again, three bends and a lot of words and test fit to
get right. Double-flared the connection to the box and connected
it to the box. Connected everything up with a tee fitting and
some 3/8" rubber line that was on the truck that originally
returned the fluid from the pump and box.
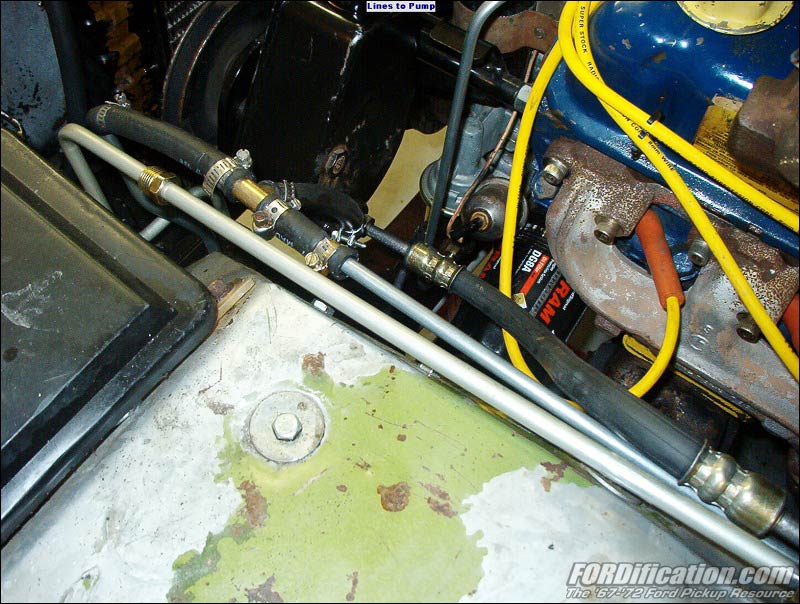
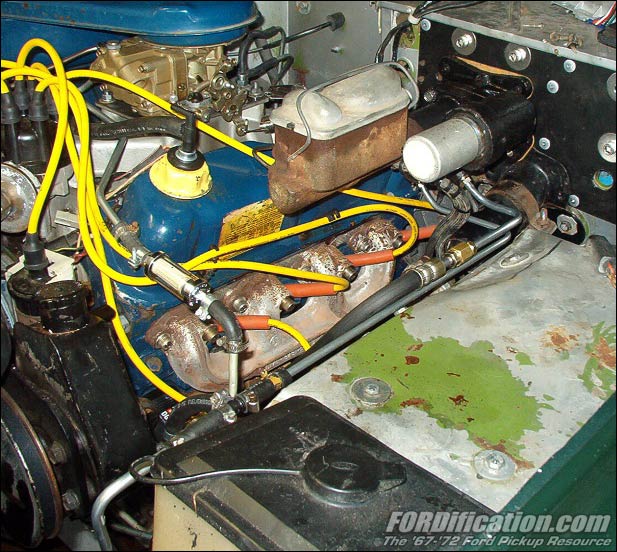
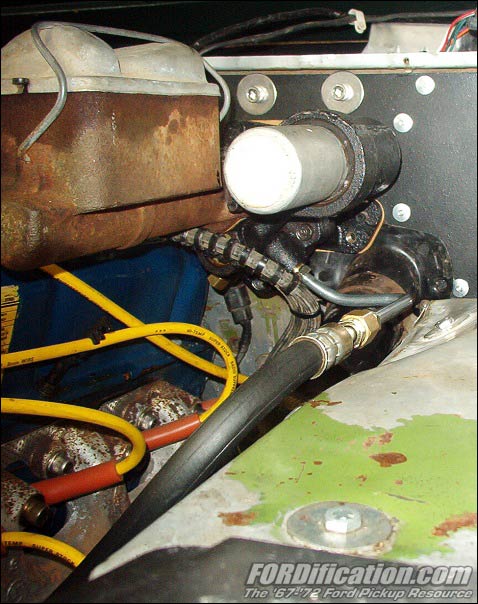
Next
was the high pressure line to the power steering pump. Being
frugal (read, cheap) I reused the HP line that was in the truck.
Took the original HP line straightened out the 2 ends, inserted
new nuts on the line, and double flared these ends. Connected
one end to the pump and started work on the other end. A few
simple bends in the line, cut to length I needed and a new nut
and double-flaring got this line done. Connected everything with
a 3/8" union and voila that line was done.
A
similar method was used with the HP line to the steering box
from the Hydroboost unit...just simple bends and connecting with
the union nut completed this job.
GREAT this is going real smoothly. Filled the PS pump with fluid
and left it for the night to work it way into the system as per
instruction for installing Hydroboost I got from the '76 Mercury
manual. (However, Murphy’s Law is about to strike.) Return the
next day after work to find about 2 pints of PS fluid all over
the floor. WTF? I forgot to tighten the low pressure fitting to
the steering box. Tightened that, cleaned up the mess and
refilled the pump. Time for the bleeding sequence following the
shop manual instructions. Jacked up the Bronco and put the front
axle on stands. Followed the instructions to the letter and had
no problems getting this system working. Felt a little soft so I
left it to come back to it the next day. Did the brake bleed for
the brakes because I am cautious and every time I work on the
brakes I bleed them.
While at work on a break, called Paul Clarke at Hydroboost and
talked to him about my installation. A finer gentleman does not
walk this earth. Was more than helpful gave me a bunch of tips
about this install. He was a little amazed that I got a unit off
a stock Ford but did not doubt they did it. Told me that the
softness was normal and after some driving would disappear. Was
really interested in my install and asked for some pictures of
it. Also sent me the install instructions for his units so I
could ensure mine would work for me. People in business like
Paul are rare and you do not hesitate to deal with them. Many
thanks Paul!!
Took the Bronco off the stands, backed it out of the garage and
started down the back alley to the street. Got to the street and
applied the normal foot pressure to the pedal to stop. BIG
mistake. Kissed the windshield with the power of the boost. Man,
this is too good to be true. Drove it for a few miles and was
really amazed at the stopping power of this unit. Another call
to Paul to ensure I had done things right and after chuckling a
little he says "Welcome to the world of really good braking. No,
your unit is working correctly". |